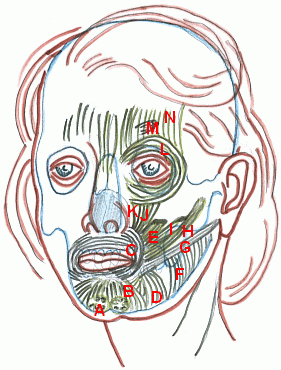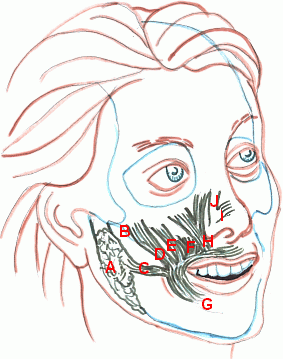
It is important to know the position of the features of the face. People who can draw the face well are often so able because they are aware and know the positions of the skeleton and the muscles and the laying of the skin that make up the portrait. Anatomical drawing and life drawing were once essential skills behind successful drawing and painting of the human figure. Art schools once encouraged repeated drawing of the human form. These two drawings show the essential features that make up the face and also animate the face for example in smiling and laughter.

| A | Mentalis | Raises the lower lip and puckers the skin |
| B | Depressor labii | Flat form on chin side - pulls down lower lip and corners |
| C | Obicularis oris | Contracts and pulls mouth open |
| D | Depressor anguli oris | Flat form on chin side - pulls down lower lip and corners |
| E | Levator anguli oris | Lifts corner of mouth |
| F | Masseter | Chewing, curved form |
| G | Risorius | Grinning muscle - pulls corner horizontally |
| H | Zygomaticus minor | Smiling muscle - lifts and draws mouth corner |
| I | Zygomaticus major | Smiling muscle - lifts and draws mouth corner |
| J | Levator labii | Shares work of lifting upper lip |
| K | Levator labii alaeque nasi | Shares work of lifting upper lip, wrinkles nose skin |
| L | Obicularis oculi | Seen outwardly under the eye |
| M | Corrugator | Pulls skin above eyebrow towards nose, vertical folds |
| N | Frontalis | Raises eyebrows and horizontal folds in forehead |

| A | Parotid gland |
| B | Zyg bone |
| C | Risorius |
| D | Zygomaticus major |
| E | Zygomaticus minor |
| F | Levator anguli oris |
| G | Orbicularis oris |
| H | Levator labii |
| I | Compressor naris |
| J | Levator labii alaeque naris |
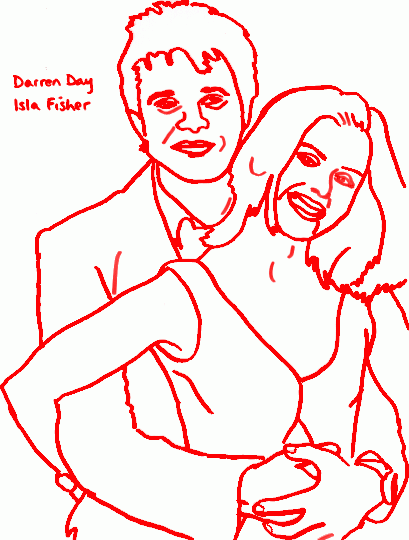
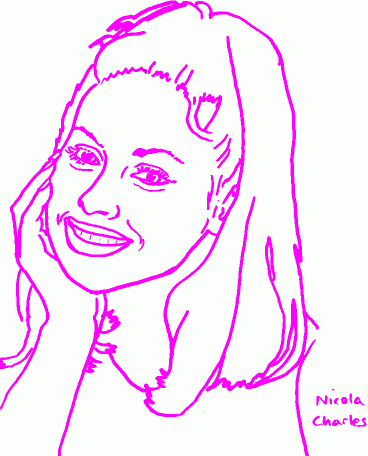
As a faster way of producing a successful portrait I suggest a two stage process. Take a portrait (for example in a magazine), with both eyes visible and open, of a size where the eyelids can be traced through an overhead projector acetate with an OHP pen.  Remove the protective paper and place the acetate over the picture and draw the essential boundaries. If two people are pictured together, do both, and include as many other features in the line drawing (no shading) as desired. Keep the acetate still and make sure all boundaries are covered. These can include darks and lights within hair, but only boundaries and NO shading! When done place the protective white sheet back under the acetate and see the line drawing produced.
Now place the line drawing alongside a sketch book and by copying (not tracing) reproduce the face. Then use the original image to fill in detail. Of course the face may be painted on painting paper. Always try more than one face.

Notice how faces combine symmetry and asymmetry in a complex relationship. General rules regarding proportions and symmetry are broken in the detail.
Tracings like this, reproduced as drawings and then paintings, as well as by looking at anatomical drawings, help the artist gain confidence to produce the features of the face covering the correct proportions in the right places. They make the task of drawing and painting life studies easier which is the natural progression and the best practice of all.
Adrian Worsfold
http://www.pluralist.co.uk
adrian@pluralist.co.uk